Како да направите инкубатор со свои раце: што ви треба за одгледување кокошки дома
On farms or individual farms, it often becomes necessary to breed chickens at home. Of course, laying hens can be used for these purposes, but it will take a long time to grow chickens naturally at home, and the offspring will be small.
Therefore, for breeding chickens at home, many use an incubator. Of course, there are industrial devices used for large-scale industrial production, but for small farms, simple incubators are also perfect, which you can easily do with your own hands.
Today we will tell you how to make an incubator with your own hands, from the simplest to the more complex.
содржина
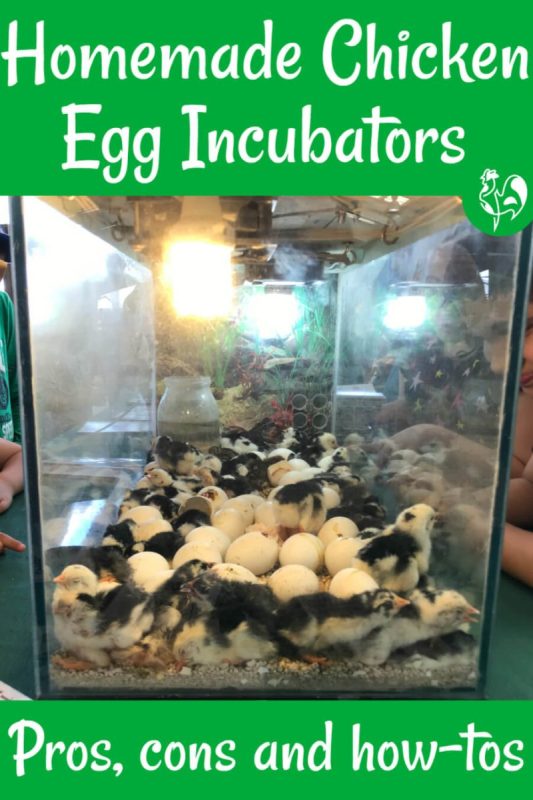
How to make an incubator out of a cardboard box with your own hands?
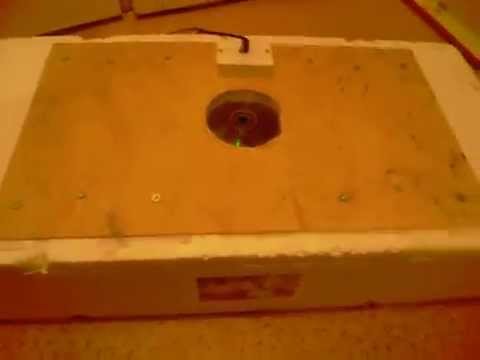
The simplest homemade chick incubator that you can make yourself is a cardboard box design. It is done like this:
- cut a small window in the side of the cardboard box;
- inside the box, pass three cartridges designed for incandescent lamps. For this purpose, it is necessary at an equal and small distance make three holes at the top of the box;
- lamps for the incubator should have a power of 25 W and be at a distance of about 15 centimeters from the eggs;
- in front of the structure, you should make a door with your own hands, and they must correspond to the parameters of 40 by 40 centimeters. Door should be as close to the body as possible. an incubator so that the design does not release heat to the outside;
- take boards of small thickness and make a special tray out of them in the form of a wooden frame;
- put a thermometer on board such a tray, and place a container of water measuring 12 by 22 centimeters under the tray itself;
- up to 60 chicken eggs should be placed in such a tray, and from the first day of using the incubator for its intended purpose, do not forget to turn them.
So, we have considered the simplest version of the incubator with our own hands. If it is necessary to grow chickens in a minimum number at home, this design will be quite enough.
High Complexity Incubator
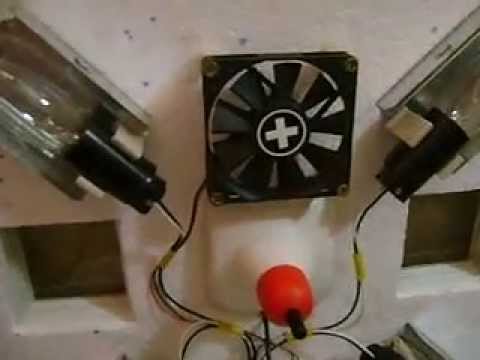
Now let’s look at how to make a more complex incubator with your own hands. But for this you need to follow the following formalities:
- if the openings of the chamber for ventilation are closed, then the chamber must be completely sealed;
- when opening the ventilation holes, the air should be mixed evenly, otherwise the temperature inside the chamber will not be uniform and this is very bad for the chickens;
- it is desirable to equip the incubator with forced ventilation.
You can also equip your home incubator with a special device that can automatically turn the tray over with eggs and save you from this work. So, turn eggs once an hour with your own hands. In the absence of a special device, the eggs are turned over at least every three hours. Such devices should not come into contact with eggs.
The first half day, the temperature in the incubator should be up to 41 degrees, then it is gradually reduced to 37,5, respectively. The required level of relative humidity is about 53 percent. Before the chicks hatch, the temperature will need to be lowered further and the importance should be increased to 80 percent.
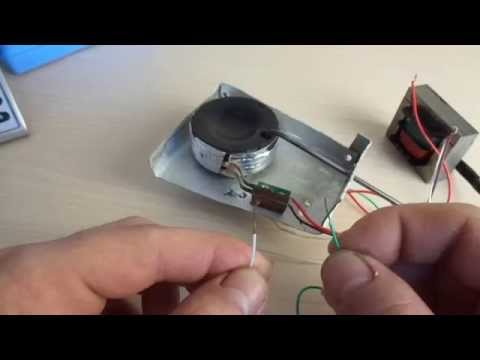
How to make an electronically controlled incubator with your own hands?
A more advanced model is an incubator equipped with electronic control. It can be done like this:
- the frame for the incubator is made on the basis of wooden beams, then it is sheathed with plywood on all sides;
- the axis is attached to the upper part of the chamber, then a tray is attached to it at the rate of 50 eggs maximum;
- the dimensions of the tray are 250 by 400 mm, its height is 50 mm;
- the tray is made on the basis of a 2 mm metal mesh;
- from the inside, the tray is covered with a nylon mesh. Eggs are laid out so that their sharp end is at the bottom;
- for heating, take incandescent lamps (4 pieces) with a power of 25 W;
- to create the required level of humidity in the chamber you need a white tin bath 100 x 200 and 50 mm in size, filled with water. Three copper arcs of wire in the form of the letter P are soldered to the bath, 80 mm high;
- you need to attach a fabric to the wire, which can increase the surface of water evaporation;
- to get air inside the chamber in the ceiling, you need to make 8 holes with a diameter of about 20 mm each. 10 holes of the same size should be made in the bottom panel. Thus, air will enter the chamber from below, be heated by incandescent lamps, and when it exits through the upper holes, it will heat the eggs;
- install in the incubation chamber special temperature sensor, which will regulate the temperature level.
In the first six days of operation, the temperature inside the incubator should be kept at 38 degrees. BUT then it can be gradually reduced half a degree a day. In addition, you will need to turn the tray with eggs.
Once every three days, you will need to pour water into a special bath and wash the fabric in soapy water in order to remove salt deposits.
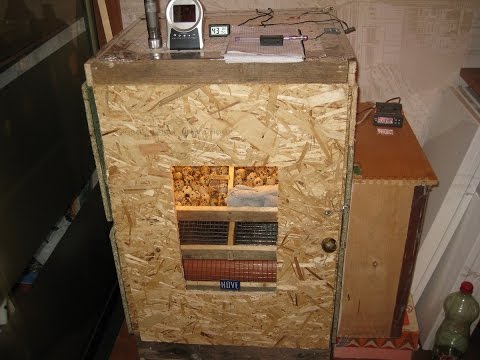
Self-assembly of a multi-tiered incubator
An incubator of this type is automatically heated by electricity, it must operate from a conventional 220 V network. To heat the air, six spirals are required, which taken from the tile insulation of the iron and connected in series with each other.
To maintain a comfortable temperature in this type of chamber, you need to take a relay equipped with an automatic contact measuring device.
This incubator has the following parameters:
- height 80 centimeters;
- depth 52 centimeters;
- width 83 centimeters respectively.
The build looks like this:
- the frame is made on the basis of pine bars 40 mm long;
- on all sides, the bars are upholstered with plywood with a thickness of 3 mm;
- free space between the bar and plywood filled with dry shavings or sawdust, you can take foam plastic in order to insulate the structure;
- the door in the form of a separate panel is attached to the rear wall of the incubator frame;
- hinged type canopies are used as fasteners.
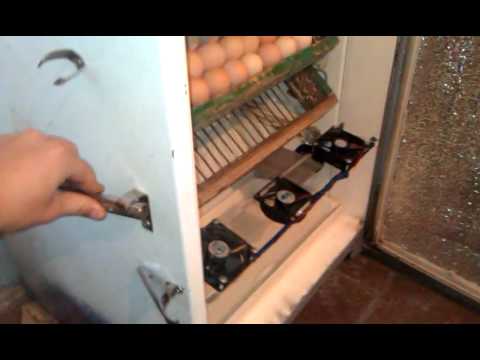
Inside the incubator is divided into three compartments by installing three partitions. The side compartments should be wider than the middle compartment. Their width should be 2700 mm, and the width of the middle compartment – 190 mm, respectively. Partitions are made of plywood 4 mm thick. Between them and the ceiling of the structure there should be a gap of about 60 mm. Then, corners measuring 35 by 35 mm made of duralumin should be attached to the ceiling parallel to the partitions.
Slots are made in the lower and upper parts of the chamber, which will serve as ventilation, thanks to which the temperature will be the same in all parts of the incubator.
Three trays are placed in the side parts for the incubation period, and one will be needed for output. To the rear wall of the central part of the incubator a contact type thermometer is installed, which is attached with a psychrometer to the front.
In the middle compartment, a heating device is installed at a distance of about 30 centimeters up from the bottom. A separate door must lead to each compartment.
For better tightness of the structure, a three-layer flannel seal is covered under the cover.
Each compartment should have a separate handle, thanks to which each tray can be rotated from side to side. To maintain the required temperature in the incubator, you need a relay powered by a 220 V network or a TPK thermometer.
Now you are convinced that you can make an incubator for breeding chickens at home with your own hands. Of course, different designs have different complexity of implementation. The complexity depends on the number of eggs and on the degree of automation of the incubator. If you do not make high demands, then a simple cardboard box will be enough for you as an incubator for growing chickens.


Вие исто така може да се допаѓа

Како раѓаат заморчиња: како се случува

Кога свињите летаат